Distributing a Script With Homebrew
Taps |
The Program |
Git Tags |
Creating a Tap |
Creating our Formula |
Uploading and Installing |
You want to distribute your program via Homebrew. You check out the official docs - the hell is a “cask”, “bottle”, “tap”, “formula”, “cellar”? How are you supposed to handle versioning and automatically compressing your release? This is a quick guide to distributing an application using Homebrew - I’ll be using a simple executable shell script as an example.
Tip Tap
In Homebrew, a “Tap” roughly means a source of truth about the versions of a series of programs. Taps contain “Formulae” (or formulas), which are just files with some metadata about a given program’s versioned distribution, as well as instructions on how to install that distribution in an end user’s system.
Homebrew has core taps and third-party taps. Core taps are the ones you tap into when using a command like brew install ruby: ruby is a formula kept in Homebrew’s core (centrally maintained) tap (homebrew/core).
What we want therefore is to create our own (third-party) Tap, to keep track of our own Formulae. By default, taps have a <user>/<repo> naming convention, where <user>/<repo> is assumed to be a github repository (though you can specify other sources). Before we go ahead and create our tap + formulae, let’s make sure our app is packaged correctly and versioned.
Our shell script
I’ve made a folder called my-shell-script/, within which I’ve placed a my-shell-script.sh file with the following contents:
#!/bin/bash

echo "This is working!"
I’ve not made it executable - while I could, I want to explain how Homebrew can do this for us later down the line in case we so choose. This is useful if, for example, we want to have Homebrew build our executables rather than having to do so ourselves every time we distribute a new version.
I’ll also go ahead and git init, git add ., and git commit the file to a new repo.
Add the github upstream origin, and (important) make sure you use a master, not main branch - by default Homebrew still works with a repo’s master branch, and will give you errors if you’re using main in the repo.
Git Tags
This is the part that tripped me up about the whole Homebrew process. Homebrew needs a .tar.gz file to pull from some hosted source, which it will then extract and build in an end-user’s system. Initially, I thought it was up to me to generate this file. Hours went down the drain writing my own build and versioning scripts in order to compress versioned releases before discovering git tags.
In order to version and distribute our current application, let’s give it a “version” tag.
# in my-shell-script/

$ git tag -a v0.1.0 -m "our first release"
This will tag the current commit as v0.1.0 (make sure to follow the versioning conventions when you create newer tags), and store the tag as a git object with a bunch of info (like our email, name, date, etc). As an aside - it’s important you use -a in order to create an annotated tag. Git has -l (lightweight) tags that are essentially just pointers to a given commit, and these won’t work for our purposes.
Let’s push this tag up to github:
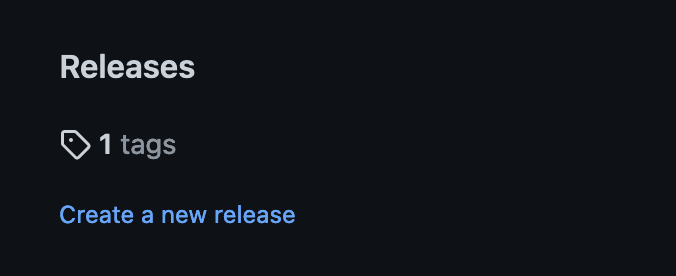
$ git push origin v0.1.0Let’s check github to make sure it’s worked. You should see the new tag in the sidebar.
Let’s go ahead and create a new release based on this tag (though it’s not strictly necessary, it’s just a nice look really). Click on “create new release”, add some release info, and once you’re done you’ll see a new release listed.
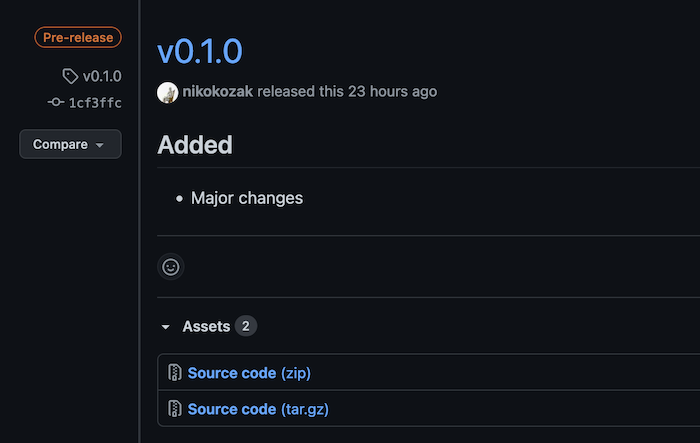
Notice that under this release there’s links to two files - a v0.1.0.zip and a v0.1.0.tar.gz. These are our releases!! We’ll use the link to the .tar.gz release to create our formula, so go ahead and copy it to your clipboard.
Creating our Tap
Make sure you’ve moved out of your my-shell-script/ folder, and run:
$ brew tap-new <your-github-username>/<the-tap-you-want-name>
(in my case it’s brew tap-new nikokozak/formulas). Note that you don’t have to have anything on github yet - this will just create a template that we can use.

Homebrew will spit out some information - notice that the folder hasn’t been created at your current location, but rather in a different location local to Homebrew’s files. Also - notice that while we specified a given tap name, Homebrew created a folder called homebrew-<the-tap-you-want-name> (in my case nikokozak/homebrew-formulas/). This is due to Homebrew’s naming conventions - when you call brew install nikokozak/formulas/foo, Homebrew will look for the homebrew-formulas repo in nikokozak's user-space. The homebrew- part is necessary, otherwise Homebrew won’t find the tap.
Let’s go ahead and move that folder we’ve just created out of Homebrew’s directory and into our own:
# Replace the path with whatever homebrew spit out for you
# after running brew tap-new

$ mv /usr/local/Homebrew/Library/Taps/nikokozak/homebrew-formulas ./
Inside this folder (already git init‘ed), is nothing more than a README file and a Formula folder. This is our “Tap”, and we’ll put any formulas we create in the Formula folder. That’s all there really is to it.
Creating our Formula
Remember the link to the compressed .tar.gz file we copied before? Go ahead and cd into Formula and run:
# in Formula/

$ brew create <https-link-to-the-tar.gz>
This should (annoyingly), open up your default editor in which you’ll find a Formula ruby file ready to be edited. We need to make sure we specify a homepage (I just use the repo for the program we created), and a license (I used MIT). The sha256 value is automatically created based on the compressed file we’ve pointed Homebrew at - if the file ever changes, the sha256 signature will be different, and Homebrew will throw an error (thus the need to repeat this process every time we make a new release of our app).
Once we’ve filled out the above fields, we can get to actually telling Homebrew how to install our application. When Homebrew first pulls our release, it automatically extracts the tar.gz file and cd’s into the contents of the folder - all the installation-specific commands we provide Homebrew in the formula spec are run as if from inside our folder.
In our case, we don’t have to specify any external dependencies, nor do we have to run commands in the user’s system. All we need is for our file my-shell-script.sh to be made executable, and moved into the bin folder so that the user can access it from the command-line. We do this by calling bin.install "my-shell-script.sh" => "my-shell-script" - this will move the my-shell-script.sh file into the bin/ folder, rename it, and make it executable. My final Formula spec file looks like this:
class Moon < Formula
  desc "Terminals ain't dead"
  homepage "https://github.com/nikokozak/my-shell-script"
  url "https://github.com/nikokozak/my-shell-script/archive/refs/tags/v0.1.1.tar.gz"
  sha256 "e0007d9e772af22a2d3c01b8a214cebf971d022447f766bb5fe97c945b5e9e60"
  license "MIT"

  # If your app depended on another Homebrew formula, you could declare it here, i.e:
  # depends_on "ruby"

  def install
    bin.install "my-shell-script.sh" => "my-shell-script"

    # You could also set env variables, like:
    # ENV["GEM_HOME"] = libexec

    # You could also execute commands, like:
    # system "gem", "build", "my-gem.gemspec"
    # system "gem", "install", "my-gem.gem"
  end

  test do
    # Ideally we'd write some tests :)
  end
end
There’s a lot more we could’ve done in our formula spec - a bunch of the commands available are listed in the Homebrew Formula Cookbook, and I have a formula for installing a Ruby Gem (which is a bit more involved, but not much) on Github. For now, this’ll do though.
Uploading and installing!
All that’s left to do now is to add an upstream origin to our homebrew-formulas folder, and push it to Github (mind you Homebrew defaults the Tap branch to main, so run git push -u origin main not master in this case).
We should now have a fully functional tap we can use!
Test it out by executing brew install <your-github-user>/<your-tap>/my-shell-script (in my case brew install nikokozak/formulas/my-shell-script).
If all works out well, Homebrew will tell you it’s downloading the formula, and installing it. You should now be able to run my-shell-script in your terminal and see the output!
Cleaning/etc.
Often times local formulae can conflict with external formulae - it’s sensible to make sure you move or delete the folders and formulae Homebrew creates in its local files when running brew tap-new and brew create.
Whenever you push or change formulae in your tap, make sure to run brew update before retrying an install. Also, make sure you brew uninstall <your program>, and delete the cached Homebrew download if you’re making adjustments to the same version and re-downloading.